 novityinfo
How to Reverse Video Footage in After Effects and Best Alternatives
Advertisement
Sometimes, the simplest visual trick can completely change the feel of your video. Reversing footage is one of those techniques. It turns an ordinary moment into something unexpected. A bird flying backward, someone catching a ball that's already been thrown, or just creating a rewind effect—it can really add something fun or clever to your project. If you're using Adobe After Effects, the good news is that reversing footage is actually easier than you'd think. But if After Effects isn't your thing or you just want a quicker way to do it, there are solid alternatives, too. Let's go through both.
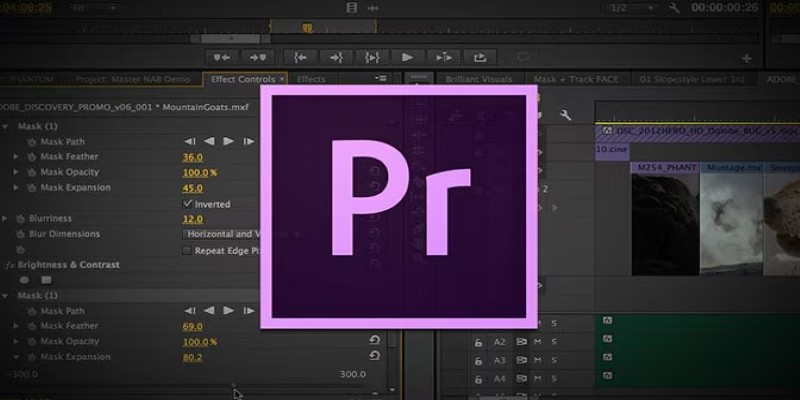
How to Reverse Footage in After Effects
Adobe After Effects is built for this kind of thing. You get full control, so if you're already using it for your edit, it makes sense to stay in the same program. Here's what the process looks like:
Step 1: Import Your Clip
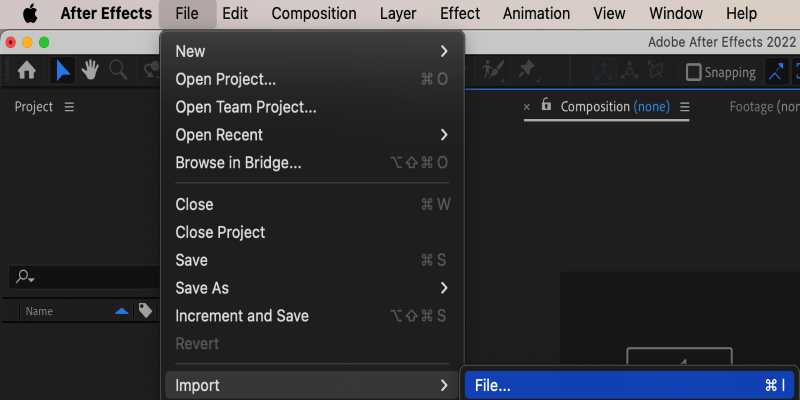
Start by importing your video file. You can do this by dragging it into the project panel or going to File > Import. Once it’s there, drop it into a new composition.
Step 2: Right-click the Clip in the Timeline
In the timeline, find your video layer. Right-click it and go to Time > Time-Reverse Layer. That’s it. Your footage is now reversed.
Step 3: Preview and Adjust if Needed
Hit the spacebar to preview. If it looks good, you're good. If it doesn’t, you might want to trim the clip or move keyframes around, especially if you’ve already applied effects or transformations.
Keep in mind—this doesn't change the original video file. It only affects how it plays back inside your composition. So, if you want to export the reversed version, make sure to render it out.
When Reversing Footage Doesn’t Look Right
Sometimes, you reverse a clip, and something just feels… off. Maybe it's someone walking backward, and it looks unnatural. Or maybe the audio still plays forward, which is kind of weird. There are a couple of things you can do.
Mute the Audio or Reverse It Separately
After Effects doesn't reverse audio when you reverse the video; if you need audio reversed, too, you'll have to bring that into Adobe Audition or another audio editor. Or you can just mute it and add music or sound effects instead.
Watch Out for Motion Blur and Frame Blending
If your clip had motion blur or was shot at a lower frame rate, reversing it can make those blurs look strange. You can try toggling frame blending on or off using the little icon in the timeline (it looks like a film frame with a tiny triangle). See what looks better.
Skip Keyframed Effects
If you’ve already added keyframes for scale, rotation, or any other effect, reversing the layer won’t reverse those keyframes. That part has to be adjusted manually. A lot of people forget this and wonder why their animations look broken.
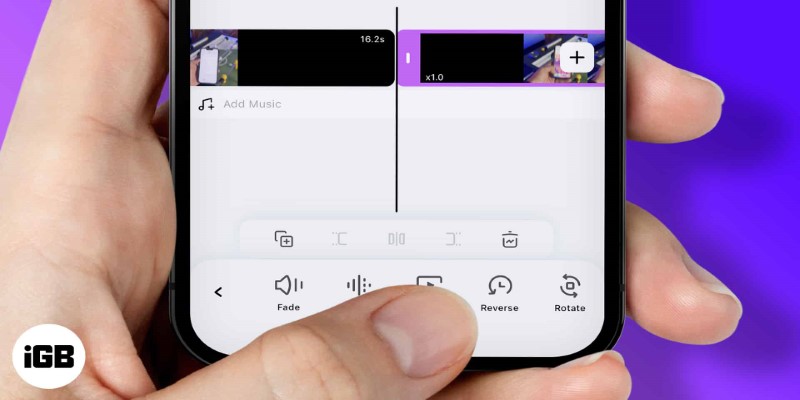
Best Alternative: CapCut
If After Effects sounds like too much, you’re not alone. Not everyone wants to deal with the learning curve or wait around for heavy exports. That’s where CapCut comes in. It’s fast, free, and way more beginner-friendly.
Why CapCut Works Well
CapCut is available as both a mobile app and a desktop tool. It's mainly used for short-form content like TikToks, Instagram Reels, or YouTube Shorts. It also lets you reverse video with just a few taps.
Here’s how it works:
Open the App or Desktop Version
Import your clip just like you would in any other editor.
Tap or Click “Edit” > “Reverse”
That's it. No layers, no keyframes, and no rendering until the end.
Save or Export Your Video
Once it's done processing, just export, it automatically handles things like keeping the clip smooth or adjusting audio.
Extra Perks in CapCut
CapCut doesn't just reverse your footage. It also gives you filters, text effects, and transitions without needing any plugins. So, if you're looking to create something fun and quick, it's a great option.
Just keep in mind that it's not designed for professional, multi-layer projects. It's more of a fast edit tool than a full studio setup.
Other Apps That Let You Reverse Video Easily
If CapCut isn’t your pick, there are still more tools out there that get the job done:
iMovie (Mac/iOS) – iMovie is a solid choice for Apple users. It includes a built-in reverse feature, but you’ll need to manually detach and mute or edit the audio if you want the whole clip to play backward seamlessly. It's simple to use and well-integrated into the Apple ecosystem.
InShot (iOS/Android) – This mobile app is ideal for quick edits, especially for social media platforms like Instagram and TikTok. The reverse tool is easy to access, and it comes with additional features like filters, text overlays, and music integration.
Filmora (Mac/Windows) – Filmora provides more flexibility than many basic editors. It features an intuitive reverse function, supports transitions, and includes extra editing tools while remaining user-friendly for beginners.
DaVinci Resolve – Best for users seeking professional-grade results, DaVinci Resolve offers a robust reverse playback feature alongside advanced editing capabilities. It's free to use but has a steeper learning curve.
These are solid choices when you don’t want to sit through long render times or deal with a steep learning curve. They give you what you need and skip the extra stuff you might never use.
The Bottom Line
Reversing video footage sounds technical, but it really comes down to choosing the right tool. If you're already working in After Effects, there's no reason not to do it there—it’s quick and gives you full control. But if you’re just trying to get a clip reversed for social media or something simple, CapCut makes it easy. It’s fast, it works, and you won’t be clicking through menus trying to figure out what “Time-Reverse Layer” even means. Whichever one you pick, reversed footage adds that quirky, sometimes surprising twist that can really change the feel of your video.
On this page
How to Reverse Footage in After Effects Step 1: Import Your Clip Step 2: Right-click the Clip in the Timeline Step 3: Preview and Adjust if Needed When Reversing Footage Doesn’t Look Right Mute the Audio or Reverse It Separately Watch Out for Motion Blur and Frame Blending Skip Keyframed Effects Best Alternative: CapCut Open the App or Desktop Version Tap or Click “Edit” > “Reverse” Save or Export Your Video Extra Perks in CapCut Other Apps That Let You Reverse Video Easily The Bottom LineAdvertisement
Related Articles
Apple Clips Review: A Simple and Fun Way to Create Expressive Videos
How to Play a Video Backwards: 6 Easy Methods Anyone Can Use

GoPro Quik: Streamlined Editing for When You’re in a Hurry

A Beginner’s Guide to Microsoft Copilot and How to Use It
How to Streamline Your Life with a Second Brain Template in Notion?
CyberLink ActionDirector: A No-Nonsense Video Editor That Keeps Things Moving
VideoGrade App: A No-Frills Color Correction Tool That Actually Delivers
How to Easily Create Smooth Slow-Motion Videos in Adobe Premiere
FilmoraGo Mobile Video Editor: Fast, Friendly, and Surprisingly Capable
Mastering Sound Editing and Delaying Music on TikTok
VN Video Editor: Effortless Mobile Editing with Advanced Features