 novityinfo
VideoGrade App: A No-Frills Color Correction Tool That Actually Delivers
Advertisement
Editing video on a phone is convenient—until you try to fix the color. What looks fine in the camera often turns out flat, too warm, or overexposed once you play it back. That's where a specialized app like VideoGrade comes in. Rather than functioning as a full editing suite, it focuses solely on one part of post-production: color correction. If you’ve ever felt frustrated by automated filters or tools that don’t give you enough control, this app might be exactly what you’re missing.
Precision Over Presets — What VideoGrade Is Built For
Unlike most mobile editors that emphasize filters, transitions, or flashy templates, VideoGrade focuses on detailed manual control. It's not trying to impress you with one-tap transformations. Instead, it gives users the ability to directly control core visual attributes like exposure, saturation, contrast, white balance, and tint. You’re adjusting the actual image data—not layering styles on top of it.
This makes VideoGrade closer to a photo editing app like Lightroom but for video. You move sliders, adjust tonal curves, and tweak specific color channels to balance your footage. There's no filter pack to choose from. If the shadows are too green or the highlights too hot, you fix it yourself.
The benefit? The results feel natural. Because you’re working with actual color values rather than effects, the final product looks more like a professionally corrected video than a heavily processed one. If you’re filming under mixed lighting or need to color-match clips, that difference matters.
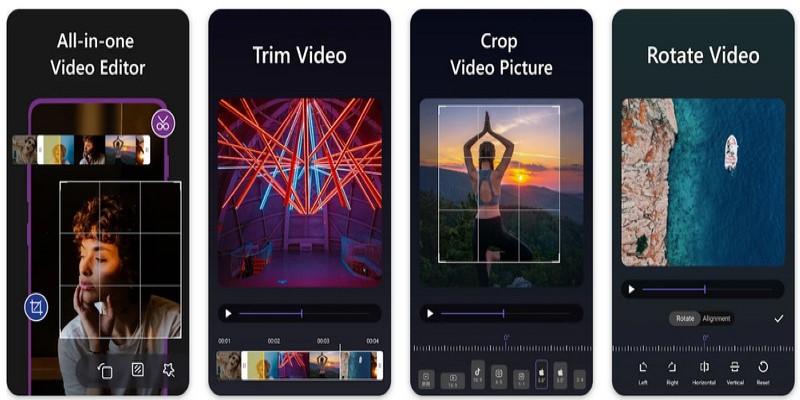
The Interface and Workflow — Simple, Direct, Distraction-Free
Opening VideoGrade takes you straight to your library. You select a clip, and the editing screen loads—no onboarding, ads, or splash animations. The layout includes a live preview window, a timeline scrub bar, and a vertical stack of adjustment tools. Each tool opens a horizontal slider with numeric values you can fine-tune in real-time.
The standout feature is the side-by-side preview. As you make adjustments, you can instantly compare your edited version with the original frame, which helps you avoid overcorrection. It’s especially useful when trying to subtly correct skin tones or restore a natural look to a scene.
Everything responds quickly. Scrubbing, previewing, and adjusting are smooth—even when working with 4K footage. There’s no lag when switching tools or applying changes. And while there’s no layer system or multitrack editing, the streamlined layout keeps the focus on correction instead of composition.
The workflow is nonlinear—you can jump between tools at any time, and changes are non-destructive until export. It’s a straightforward system that respects your time and doesn’t require a learning curve.
Key Features That Make a Visual Difference
While VideoGrade limits its scope, it maximizes usefulness within that range. Below are several tools and features that provide real value, especially to those concerned with quality over gimmicks:
RGB Channel Isolation: You can adjust red, green, and blue levels independently. This is helpful when correcting color imbalances from different lighting conditions.
Temperature and Tint: Fine-tune warmth and green-magenta shifts for natural white balancing, especially in indoor or mixed-light shots.
Sharpness and Blur: Add gentle clarity or soften parts of a clip without introducing noise or artifacts.
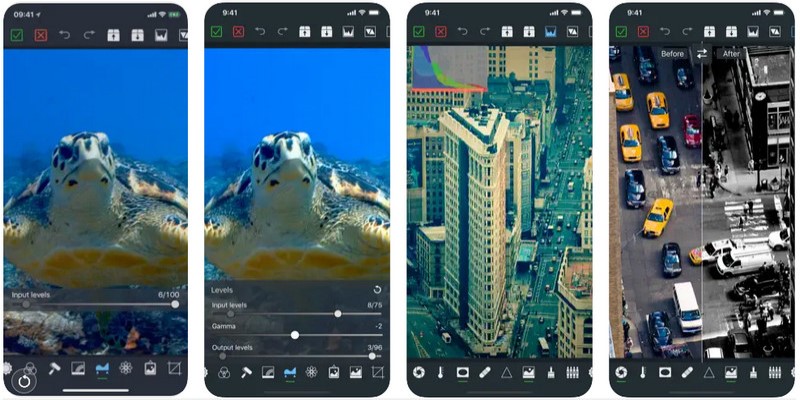
Highlight and Shadow Recovery: Light and dark areas can be brought back to life, offering more depth to overexposed or underexposed footage.
Saturation by Channel: Instead of adjusting overall saturation, you can push or reduce individual colors—handy for toning down intense reds or bringing out subtle greens.
Split Toning: A more advanced option, this allows you to tint highlights and shadows differently, often used for cinematic color styling.
The adjustments are subtle and layered. You won’t find animation presets, titles, or audio tools here—but what it offers is robust and focused.
Where It Shines and Where It's Not Meant to Compete
VideoGrade is best when used for corrective work—balancing footage, matching color across scenes, or restoring clips that were shot under poor lighting. It’s not meant to build a full edit or finalize a project entirely within the app.
If you’re a mobile filmmaker, travel vlogger, product videographer, or student working on polished visual assignments, it offers enough precision to make your clips look intentional and cohesive. It's also a solid second step in your editing pipeline. After trimming in a primary editor, you can run clips through VideoGrade to clean up color before posting or exporting final edits.
That said, it's not a tool for users who prefer automation or fast output. There are no templates, auto-correction features, or filters. You'll need to understand the visual problem you're solving and manually apply adjustments. That may be a dealbreaker for beginners or casual users looking for speed over accuracy.
There are also some technical limitations. Export formats are fixed—you can export in 720p, 1080p, or the original resolution, but there’s no support for custom formats or codecs. It also lacks LUT (Look-Up Table) integration, which limits its use in professional workflows that depend on stylized, repeatable grading profiles.
Performance-wise, the app is optimized for newer iOS devices. On older phones or tablets, you might see delays during playback or longer render times on high-resolution clips. But stability is solid—it doesn’t crash under pressure, and edits can be saved and resumed without issue.
Conclusion
VideoGrade isn’t for everyone—and that’s exactly why it works so well. By narrowing its focus to color correction and nothing else, it avoids the clutter and distraction of most mobile editing apps. It doesn’t assume what your footage needs. It gives you the tools and lets you decide.
If you’re the kind of creator who’s more concerned with balance and tone than transitions or titles, this app offers a clean, focused workspace to make your videos look their best. It’s not flashy, but it is functional. And in the mobile editing world, that’s rarer than it should be.
Advertisement
Related Articles

InShot Review: The Go-To Video Editor for Quick, Polished Social Content
VideoShow Review: A Mobile Editor for Quick, Casual Projects
4K UHD vs 1080p Resolution What You Need to Know
11 Best CR2 to JPG Converters You Can Use Right Now

GoPro Quik: Streamlined Editing for When You’re in a Hurry
How to Play a Video Backwards: 6 Easy Methods Anyone Can Use

Know More about the Pinnacle Studio: Video Editor on Windows to Download

Funimate: The Video Editor That Turns Effects into Play

How to Fix Audio Delay in VLC Player

A Beginner’s Guide to Microsoft Copilot and How to Use It
How to Easily Create Smooth Slow-Motion Videos in Adobe Premiere